Coffee is always better when it is fresh. But to get a fresh grind and a fresh brew, you have to begin with a fresh roast. I love the flavor of coffee roasted with care in small batches. But, for many years, I was intimidated by the idea of roasting my own beans. I felt like I needed to go to Africa and hand-pick the beans myself to be able to properly roast coffee.
However, green coffee beans can be found much closer to home. With a bag of beans and a cheat sheet of tips, you’ll find that you, too, can roast your own coffee.
Roasting coffee beans is simpler than you thought. You don’t even have to own a coffee roaster! However, to get the perfect roast, you have to pay attention to the small details. You will want to choose your green coffee beans carefully, use the correct roasting time and temperature, and have a way to cool down your beans when they are done.
If you are ready to try your hand at making specialty coffee at home, we’re here to cheer you on! We’ll go into how to choose your green coffee beans, discuss different roasting methods, and walk you through the step-by-step process of roasting your own coffee.
Let’s put our oven mitts on and dive in.
A Bit About the Bean
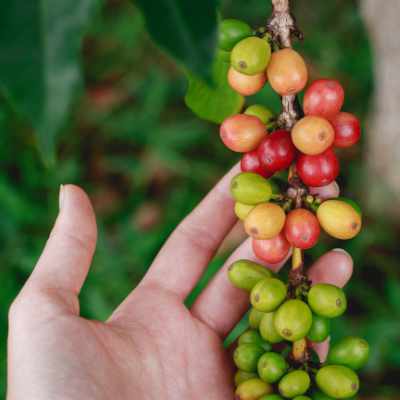
One of the most difficult parts of starting to roast your own coffee beans may be finding the coffee beans in their green form. Large roasting companies trade directly with a coffee bean producer, coffee co-op, or have a contract with an importer they trust. However, you may not want a lifetime subscription to green beans. Maybe you just want to try your hand at roasting a batch of coffee beans for personal use and see how it goes.
You can sometimes find unroasted beans for sale at specialty coffee shops (either online or locally). If not, Amazon is always a solid fallback option.
Some things to look for when buying these green beans are:
- The country of origin
- The harvest season
- The coffee variety
Pro tip: If you get a chance to see the beans in person, also look for an even shape, color, and size in the batch. Mottled colors could indicate that the beans were dried improperly.
These factors will all contribute to the flavor of your roast. You can pinpoint the flavors you enjoy in your cup of coffee and look for the right green coffee beans accordingly.
For example, if you enjoy nutty, toffee, or chocolate flavors, you can look at South American and Vietnamese coffee beans. Coffees from Indonesia are more likely to have a rich spicy flavor. And countries such as Kenya, Tanzania, and Ethiopia are known for more fruity flavors.
Once you decide on your beans, you are ready to start roasting!
The Different Roasts
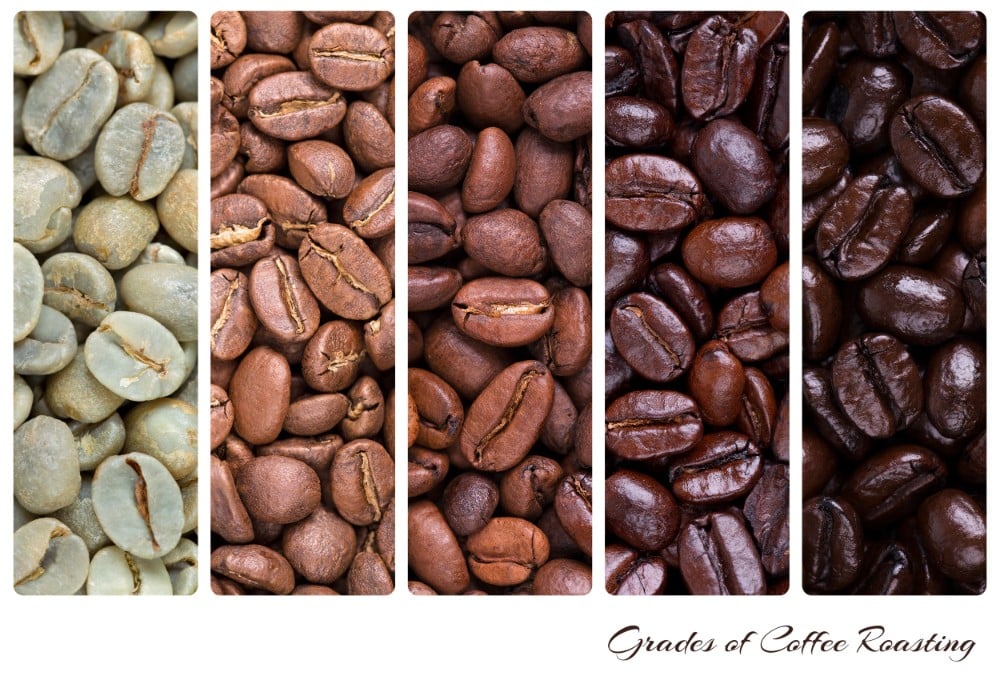
When you roast your own beans, you get to be the artist and designer. You can decide which flavors appeal to your tastebuds and pull your coffee beans off the heat at the right time. Here is a cheat sheet on the different types of roasts to help you get your roast level down to perfection.
Light Roast
The light roast happens right after you hear the first crack. When you hear the first crack, you know your coffee has now become drinkable! Light roasts tend to have a higher acidity level than darker roasts. While darker roasts have been historically more sought after, trends are shifting more towards the light roasts in many coffee shops. This is because you will taste more nuances in flavor with lighter roasts. Many breakfast blends are light roast coffees.
Medium Roast
For a medium roast you will want to leave your coffee beans in the game after the first crack, but pull them off the heat before you hear the second crack. At this point, the beans begin to caramelize. This is a nice middle-of-the-road roast. Many house coffees are a medium roast.
Medium-Dark Roast
Medium dark roast hits right about the time you hear the second crack. This roast is not quite as smoky as a dark roast, but has a nice body to it. A full-city roast often falls into this category.
Dark Roast
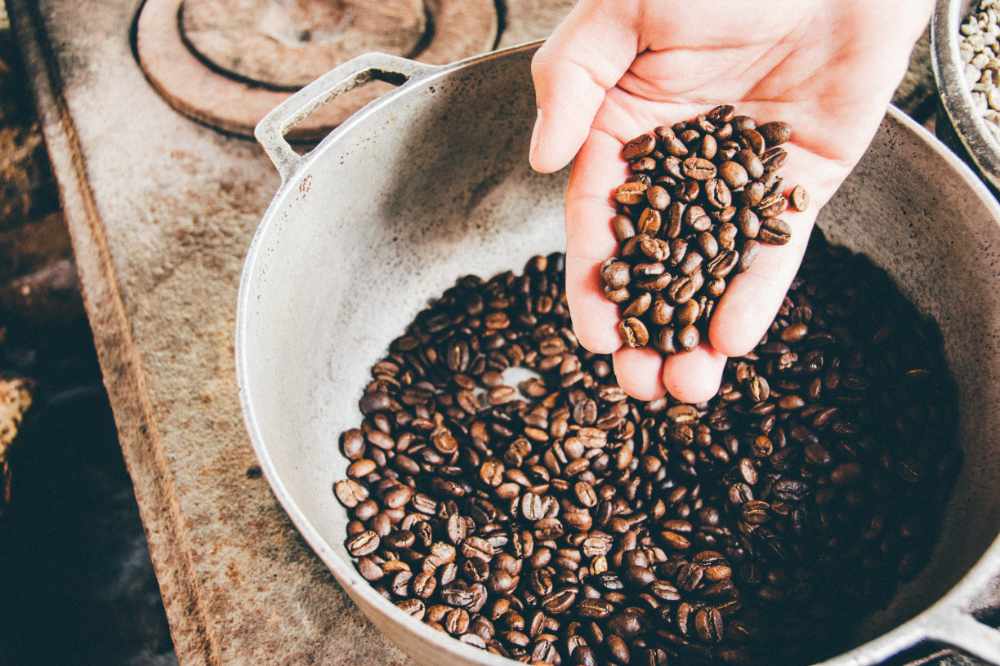
Dark roasts are roasted past the second crack and often carry a richer flavor and more body than lighter roasts. The beans will be a dark brown and you can see an oily sheen on the surface. French roast and Italian roasts are dark roast coffees.
Home Roasting Tips: The Set-Up
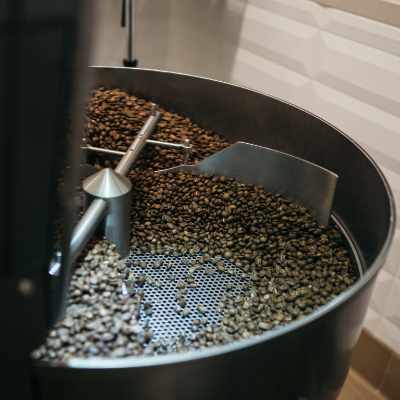
If you are planning to make coffee roasting a serious habit, you may want to invest in a home coffee roaster. The prices on home coffee roasters vary widely, ranging from $100-$1000. The most common types are drum coffee roasters and air coffee roasters. A drum roaster cooks your beans using convection and conduction, while an air roaster is a convection method. Drum roasters are more widely used, however, many point to air roasters as having a purer taste.
But, if you are just wanting to test the waters, or maybe roast a batch a few times a year, you can also use equipment you already have at home. You can roast your coffee beans using an oven, a stovetop, a hot air popcorn popper, and, yes, even your air fryer!
Whichever method you choose, here are some tips for roasting coffee beans at home:
Make sure the area is well-ventilated: For lighter roasts, you may get away with roasting your beans indoors without much smoke. However, by the time you hear the second crack, your beans will tend to smoke. Choose a well-ventilated area, open a window, or turn on the vent-a-hood so you don’t set off your smoke alarm.
Don’t overcrowd your beans:
If you are using a home roasting machine or other household alternative, you may be looking at roasting your coffee in smaller batches. Home roasting machines may roast upwards of 500 grams of beans or only 50 grams. You’ll only be able to fit a small batch into a popcorn popper, or cast iron skillet, as well. Whatever you do, don’t overcrowd your beans. This will lead to an uneven roast.
You may end up with less roasted coffee, but the good news is small batches are usually easier to control. Roasting a small batch can ensure that you get the most bang out of your bean.
Watch and Listen to Your Beans:
Maybe a watched pot never boils, but the same adage doesn’t fit for roasting coffee beans. You will want to keep your eyes and ears on your coffee beans to make sure they are roasting evenly. If you notice some beans roasting faster than others, give your beans a stir.
When you hear the first crack, your beans can be pulled at any time. If you remove your beans from the heat right after, you will get a light roast full of flavor nuances. If you wait a bit, you will get a middle-of-the-road medium roast. For darker roasts, wait until you hear the second crack. Don’t leave your beans too long after the second crack or you will end up with charcoal.

A cooling method:
Many coffee roasting machines will also cool your beans for you. However, if you are using another roasting method, make sure you have a cooling plan in place before you turn the heat on under your green coffee beans.
Depending on the method you use, your roast can be ready in under 15 minutes. When you pull your beans off the heat, they will continue to cook. So, if you’ve roasted your beans to perfection, you will want to stop the cooking action as soon as possible so you don’t overcook your beans.
You can dump your roasted coffee beans into a chilled colander and shake it until the beans are just warm to the touch. This not only cools your beans but also releases the chaff. You may want to take this cooling method outside so you don’t end up with the chaff floating through your kitchen.
Home Roasting Methods: The Step-by-Step
If you decide to invest in a coffee roaster, it’s best to read the directions that come in the box because each model is different. However, there’s no need to buy expensive equipment for one bag of green beans. We’ll walk you through how to roast your beans using household appliances you already have. This way you can test out the coffee roasting waters with no pressure.
The Oven Roasting Method
You’ll need:
- A baking sheet or pizza pan
- A wooden spoon
- An oven mitt
- A metal colander for cooling
- To oven roast your coffee, first preheat the oven to 500 degrees Fahrenheit.
- Spread your green coffee beans on a baking sheet or better yet, a pizza pan with small perforated holes (if the holes are too large, your beans may fall through). Make sure the beans are spread evenly over the pan, and are touching, but are not stacked on top of one another.
- When your oven is heated to the proper temperature, put your beans in. Use the oven light to keep an eye on your coffee beans.
- If you notice that the beans towards the edges are changing color faster than the inner beans, use a wooden spoon to stir your beans. You will want to stir your beans about 2 times during the roasting process. Strike the right balance of keeping your roast even, and not letting the temperature drop too much by opening your oven door too often.
- Also, listen to your coffee beans. The first crack will sound and others will follow (similar to popcorn). Then there will be a lull in the popping sound before the second crack. If you like a medium-dark or dark roast you will want to wait for the second crack before pulling your beans out of the oven.
- The entire roasting process takes about 10 minutes total. This is considered a fast roast method.
- Use a chilled colander to cool your coffee beans.
The Stovetop Roasting Method
You’ll need:
- A cast iron skillet
- A wooden spoon or whisk
- An oven mitt
- A metal colander for cooling
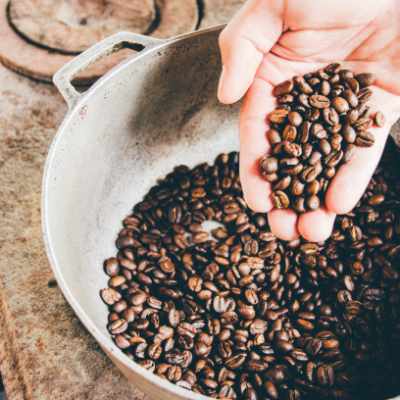
With the stovetop method, you have a bit more control than an oven roast. You are able to see your beans clearly to check for burning and you can also watch the color progression much easier.
- First, preheat your pan (and turn on your vent-a-hood!) You’ll want a high temperature of about 500 degrees Fahrenheit.
- Use about 1/2 a cup of green coffee beans. You don’t want to overcrowd your pan.
- Stir your beans for an even roast. The benefit of the stovetop method is that you can keep tabs on your beans as they change colors. The beans will turn from green to yellow, then light brown to dark brown.
- At about 5 minutes in, you should hear the first crack. At this point, you can decide whether you want to pull your coffee beans for a light roast coffee or wait for the second crack.
- You can adjust the temperature depending on how your beans are progressing. You won’t want to roast on the stovetop for longer than 10 minutes.
- Cool your roasted coffee.
The Hot Air Popcorn Popper Method
You will need:
- A popcorn popper
- A bowl for catching the chaff
- A metal colander for cooling
A hot air popcorn popper has a similar effect on your coffee beans as an air roaster. This can be one of the simplest ways to roast your beans.
- Add about 1/2 a cup of green coffee beans to your popcorn popper. You will want to place the air roaster near an open window or in a well-ventilated area.
- The papery chaff on the coffee beans will loosen as they roast. You can place a bowl next to the popper chute, so the chaff stays somewhat contained.
- Listen for the first crack. In this method, the beans may hit the first crack at about 3 minutes in.
- If you wait around for a darker roast, by 6 minutes you should already hear the second crack. You want to pull the beans right after you hear it so your beans don’t burn.
- Cool down your coffee roast.
The Air Fryer
You will need:
- An air fryer
- A metal colander for cooling
And last but not least, the air fryer. These have become a popular household staple, and it’s nice to know that you can not only make air-fried chicken in it, but also roast your beans! (Although, you may not want to try one right after the other.)
- To roast your coffee beans using an air-fryer, first preheat it to at least 450 degrees Fahrenheit.
- Add a single layer of beans to the basket. You don’t want to fill up your basket with beans, as this will give you an uneven roast.
- You should hear the first crack at about 5-7 minutes with this method. Pulling your coffee off the heat after the first crack will give you a light roast. For a medium roast, leave your beans a bit longer, but pull them off before you hear the second crack.
- Cool down your roasted coffee beans.
Degas and Store Your Roasted Coffee Beans
After you have finished roasting your beans, it can be tempting to brew yourself a cup right away! However, freshly roasted coffee beans degas carbon dioxide, and you will need to let your beans off-gas for at least 4 hours or overnight. When your beans have degassed, you can seal them in an airtight container to preserve their freshness.
You now have a roasted batch of coffee beans that are designed for your tastebuds!
FAQs
What is the best way to roast coffee beans?
There are a wide variety of methods to roast your coffee beans. You can use your own oven, or even roast beans over a campfire! However, the most efficient way to roast your beans will be to use a coffee roasting machine that was designed to evenly roast and cool your beans. A close second would be a hot air popcorn popper.
What is the best brewing method for a French roast?
Dark roasts can make delicious coffee, just don’t overbrew it! Quick brew methods will showcase the flavor of a French roast coffee well. If you are using a French press, you can steep a French brew for a shorter amount of time than you would with a lighter roast.
What is the best type of coffee grinder to use?
Burr grinders are often more expensive than blade grinders, however, they can give you a better result. While blade grinders tend to whack at your beans unevenly, burr grinders can give you a uniform ground size. This uniformity in the grounds allows for a more even, smoother-tasting brew.
Wrap Up
That’s a wrap on how to make home roasted coffee. Whether you are a light brew coffee connoisseur or a dedicated dark brew fan, you have the tips to start roasting your own coffee. As you can see, you don’t necessarily need a lot of special equipment. Just pick out a starter bag of green coffee beans and you are set to try out your skills!


