There are hundreds of fantastic coffee makers out there. From the classic Mr. Coffee to Cuisinart and everything in between. Although there is a huge variety of options available, non can compete with Keurig when it comes to compact coffee machines.
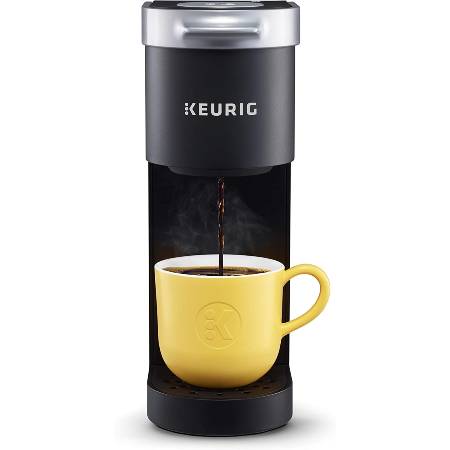
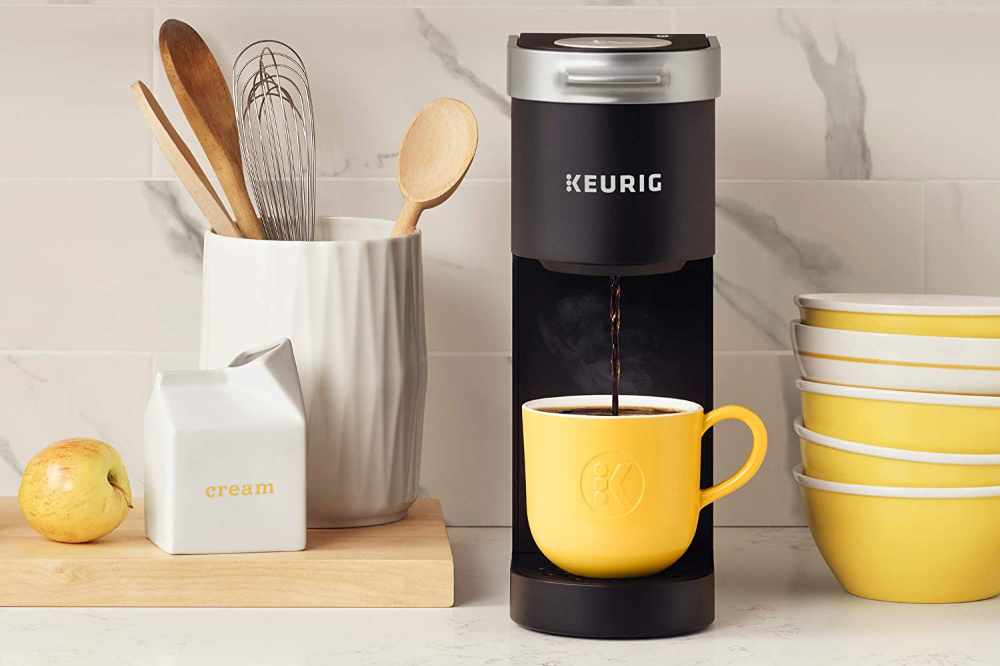
The Keurig K-Mini has a tiny footprint of 4.5″ wide x 11.3″ deep. It’s a single-serve coffee maker that can be tucked away easily when not in use and will fit in any kitchen, no matter how small it is.
It’s been said that good things come in small packages but is this really true for the K-Mini?
This review is going to look at this coffee maker in-depth to find out what it can do for you and is it worth considering for your next coffee machine purchase. Everything you need to know about this product is right here, all the pros and cons so let’s not delay any further, here’s the K-Mini K-cup pod coffee maker.
The Keurig K-Mini
- Keurigs Slimmest Design Yet
- Perfect For Small Spaces
- Single-Serve Brewer
Pros
- Simple To Use – One Brew Button
- Small Footprint = Tidy Countertops
- Brews Great Coffee
- Three Color Options
- Cord Storage For Easy Transport
- Inexpensive
Cons
- Not Programmable
- No Brew Strength Control
The Keurig K-Mini Single-Serve K-Cup Pod Coffee Maker
Design
The K-mini single-cup brewer is absolutely one of the most compact coffee makers available to buy. It’s plain and simple in design without any confusing knobs and dials on the front. It comes in matte black, studio gray, and oasis blue color options so not a huge choice but one of these is bound to look good in any kitchen.
It has hidden cord storage at the back which is great for taking it to work or traveling. There are only two buttons on the top, one for power and one to brew coffee. The water tank is fitted at the back and has a level indicator window. The lid opens straight up the way to access the brew basket which doesn’t pull out to the front as some other Keurig models do. This can make it a touch more difficult to access the brew basket.
It has a removable drip tray to accommodate taller mugs and this also makes it easier to keep clean. The machine has an auto-off feature that causes it to shut-off after the brew cycle to save energy if you forget to switch it off.
Size
The slim design of this coffee maker means it hardly takes up any counter space. At 12 inches tall (16.8″ with handle open) it can fit under wall cupboards easily and it’s 11.3″ deep and 4.5″ wide. It weighs 4.6 pounds (2kg) and the cord is around 24 inches.
Cup Sizes
This coffee maker can easily accommodate mugs that are 6inches tall and if you remove the drip tray it can fit a 7-inch travel mug. Rather than setting the cup size using any programming, this machine works by simply brewing the cup of coffee using all the freshwater added. You can brew anywhere from a 6-ounce cup to a 12 ounce one, just add the volume of water you require and press brew.
Water Reservoir
This coffee brewer features a one-cup reservoir so you do need to top it up every time you brew a cup of coffee.
The water reservoir is located at the back of the machine and is not removable. This means you need enough space above the machine to pour from a jug or container. It has a level indicator window so you can easily see how much water you’re adding to accurately measure each cup.
The fact the reservoir can’t be removed can make it a bit more tricky to keep clean. Just be sure you don’t try to clean it with any kind of cloth that can leave lint residue.
Pods
This machine accepts k-cup pods of which there are over 70 brands and hundreds of varieties to choose between from delicious coffee to tea and even hot cocoa options. If you have a my K-cup universal reusable coffee filter then you can fill this with any ground coffee you like. Make sure it’s a Keurig My K-Cup option as using off-brand pods can invalidate your warranty.
Environmentally Friendly
Keurig is making an effort to be more eco-friendly with its new coffee machines. They are actively reducing the amount of ‘virgin plastic’ used in each brewer. This means that less new plastic is utilized with each machine thus less plastic is created to enter general circulation.
They have already reduced the amount of virgin plastic by over 1 million pounds by 2020 so this is good news for those trying to be more conscious of looking after the planet.
Warranty
This machine comes with a limited one-year warranty and Keurig recommends that you register your new device on their website so they are aware of your purchase history. It’s always worth checking the return policy when you buy any new coffee maker.
So long as you have verified proof of purchase, Keurig will repair or replace a defective machine free of charge in this first year. It’s worth noting that this warranty does not cover damage caused by using non-Keurig pods or accessories; that will invalidate this warranty.
What It Lacks
The hallmark of this K-Mini coffee maker is the slim design and simplistic way it functions. There’s no strong brew or other programmable options. If you want a bit more from your machine here are some other Keurig options and the extra features they have.
K-Mini Plus
For a little extra, the Keurig K-Mini Plus has a few bonus features you may enjoy. A removable water tank makes for easy filling and cleaning and more color options allow you to be a bit more expressive with this coffee maker. It comes with pod storage to keep your kitchen counters tidy but despite these extras the size of the machine is the same as the regular K-Mini.
K-Elite Single
This little single-serve coffee maker boasts temperature controls and even the option for iced coffee. It has a display screen with a digital clock and a high-altitude setting. It can accommodate taller travel mugs and has a 75 ounce, removable water reservoir.
K-Duo
The K-Duo is perfect for those who enjoy freshly brewed filter coffee as well as single serve. It has a separate warming plate and glass carafe that can hold 12 cups of fresh brewed coffee. A 60 ounce, removable water reservoir and digital display with timer and high altitude setting make this model user-friendly but it’s worth noting that it only comes in one color option.
K-Select
The K-Select is like the big brother of the K-mini. The main difference (aside from the appearance) is the 52-ounce removable water reservoir that means you don’t have to keep refilling it. More color options and high-altitude settings make this a more customizable choice.
K-Slim
This option is very similar to the K-mini but is a good choice if you feel you need a bigger water tank. It comes with a 46 ounce, removable one and can accommodate travel mugs easily. It has the benefit of high altitude settings so a bit more versatile if that’s what you require. It only comes in matte black so you can’t get creative with color options.
Your New Keurig Machine
How To Set Up
When you first unpack your Keurig, remove all the packaging and plug in the power cord to check it’s working. The power button should illuminate when you press this.
Add 8 ounces of water to the water tank and close the lid. Place a mug on the drip tray.
Open and close the handle on the top but don’t insert a k-cup pod. This should set the brew indicator light to start flashing showing that the machine is ready to start brewing.
Press the brew button and it should switch to a continuous light before flashing to indicate it’s heating up. When it goes to a continuous light again the water should start dispensing into your cup. Wait until the brew cycle is complete and then discard the water.
This is called a cleaning cycle and it cleans your machine ready to start brewing coffee.
Brewing Your First Cup
It’s so easy to brew coffee with this machine and once it’s set up you’ll have a delicious coffee in no time.
Fill the water reservoir at the back of the machine with the exact amount of water correlating to the size of coffee you would like.
Place a mug that can hold this amount on the drip tray.
Choose your favorite K-cup pod and place it in the brew basket at the top of the machine.
Close the handle and press the brew button.
That’s it!
Hot coffee should start flowing into your mug and in around 2 minutes it’ll be ready for you to enjoy it.
Cleaning
The exterior of the machine can be cleaned by wiping with a damp, soapy cloth. Make sure the cloth is non-abrasive and lint-free.
The drip tray can be removed but be sure you keep it level as you do so as it can hold up to 8 ounces of water and you don’t need that spilling everywhere! Empty this into the sink and clean in warm soapy water, rinsing well.
The water tank can be wiped clean with a lint-free cloth and should be left to air dry completely. Don’t dry the inside of the tank with a cloth or tea towel as this leaves lint and cloth fibers behind.
The K-cup brew basket can be removed from the machine by gently pressing it out from underneath. The funnel detaches by pulling firmly on it but be careful as this exposes the exit needle which is sharp.
Wash the pod holder and funnel in warm soapy water and rinse thoroughly. You can dislodge coffee grounds from the exit needle by gently inserting a straightened paper clip and twisting it around. The same can be done for the entrance needle located at the top of the machine.
Once you clean out the brew basket and needles it’s a good idea to run two cleansing cycles through the machine to flush it out before you brew coffee with it.
Descaling
To keep your machine in good working order you need to descale it regularly (every 3-6 months). It’s important to use the Keurig descaling solution as off-brand products can invalidate your warranty.
Pour 1/3 of the solution into the water tank and top up to the 10 oz line with fresh water. Place a large mug (at least 10 oz) on the drip tray and press the brew button. Wait until the contents of the tank have filled the mug and discard. Repeat this process three times until all the descaling solution is used up.
Flush the machine through with 12 ounces of fresh water at least three times. You may need to repeat this if a residual taste remains.
To reduce the need for descaling, use a water filter jug to top up your machine. This also helps improve the taste of your coffee.
F.A.Q.s
Why are there grounds in my coffee?
Sometimes grounds can escape and become lodged in the needles of the machine and end up in your cup of coffee. If this happens, clean the entrance and exit needle using a paper clip.
Why is my K-mini is only brewing a partial cup?
Start by pressing and holding the brew button for 5 seconds until all the water is dispensed. The three things to check if this problem persists are the needle, the brew basket, and scale build-up.
Try unclogging the needle using a paper clip, thoroughly clean the brew basket and descale your machine.
If none of these steps solve the issue then contact Keurig customer support.
The brewer won’t brew coffee
The usual culprit is not enough water in the brew reservoir. It needs at least 6 ounces to brew coffee. Try topping up the water tank and press the brew button again.
Why is there no power to the machine?
The first thing to check is that the power button has been switched on.
Next, try the power outlet. Try plugging in other kitchen appliances to check there are no issues here.
The machine automatically powers off 90 seconds after the last brew so check this is not the case.
If the problem persists, contact Keurig customer support.
Can you make specialty coffee with a Keurig?
No. The Keurig doesn’t brew specialty coffee like espresso and latte. You need an espresso machine for these kinds of coffee.
Conclusion
The Keurig K-Mini is a compact and functional coffee maker. It’s really easy to use and a great option for taking to work or on holiday. It doesn’t have many options for tweaking your coffee other than different cup sizes. It’s a simple and effective machine and makes a huge variety of different hot beverages. A great choice for work, college, in the RV, or anywhere you like!
CLICK HERE TO CHECK IT OUT AT AMAZON
Related Reading
How to Make Iced Coffee with A Keurig
Keurig Troubleshooting Guide (Tips To Get Your Keurig Brewing Again)


